
In this guide, we will show you how to easily align your WooCommerce shop page products. Go from a messy unorganised layout to a visually stunning, neatly aligned page in next to no time.
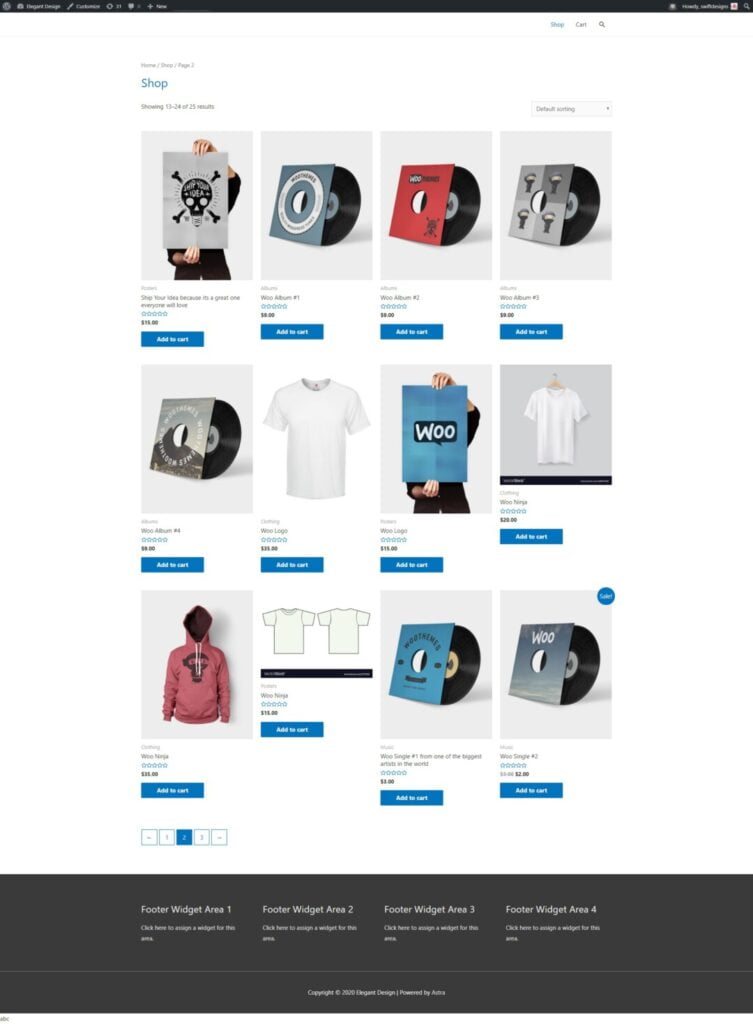
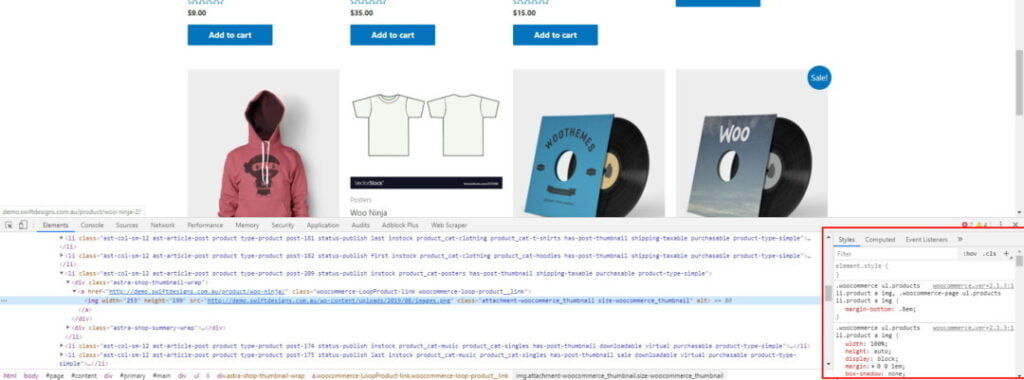
Do you have a WooCommerce shop or category page that looks like a mess like this?
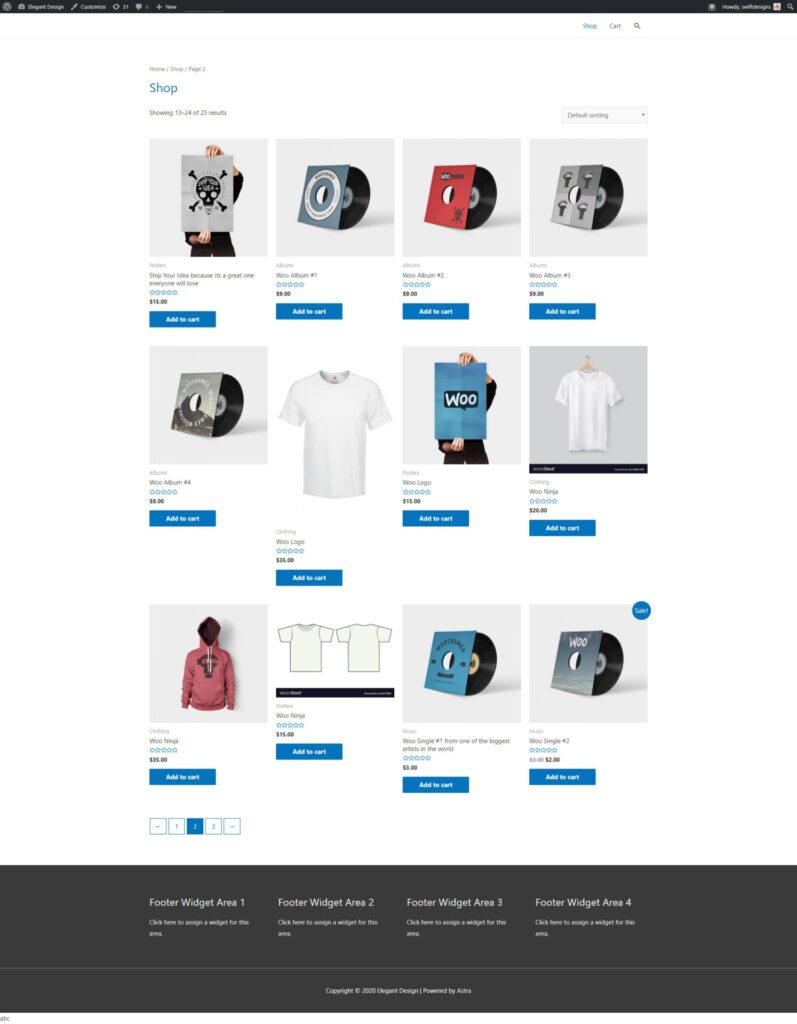
The products are all aligned differently and nothing looks organised. Would you like to have a shop page that looks like this instead?
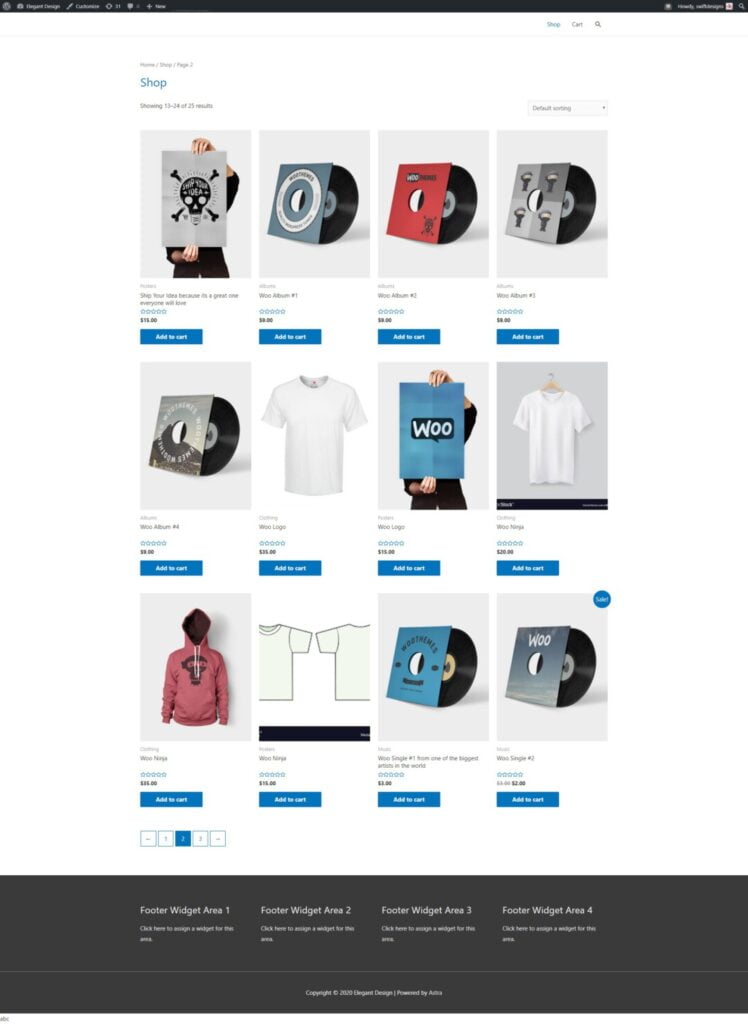
Well, the good news is you can. And it’s not really that hard. In next to no time you’ll be able to have a neat looking website that you will be proud of and shoppers will love.
How to easily align your WooCommerce shop page products
1. To begin getting everything lined up correctly you first need to head to Appearance >> customize >> WooCommerce >> product images
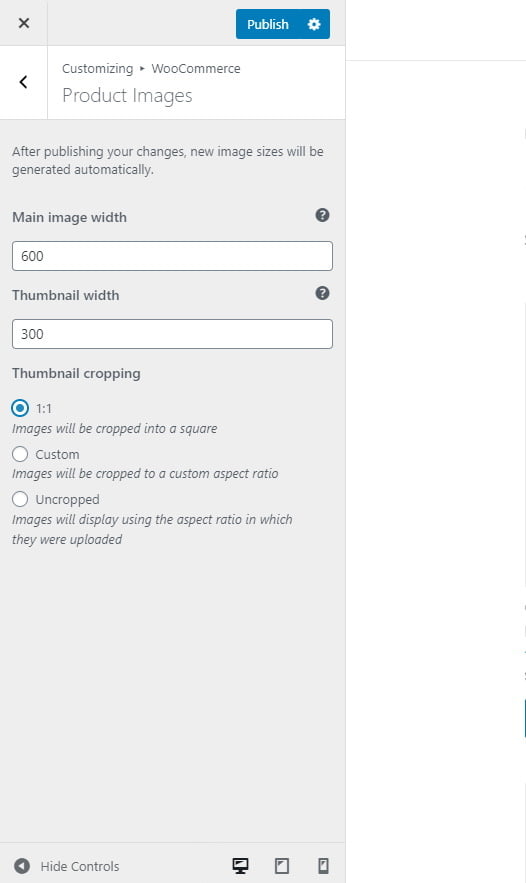
This is where we need to make the changes for the images.
- Main image width defines the width of the main image in the gallery on the individual product page.
- The thumbnail width sets the width of the image on the shop page
- Thumbnail cropping will define how the images are displayed on the shop page. This is the setting we need to focus on.
The images will have the biggest impact on a shop page layout. Fixing them will solve a large portion of the problem, and many store owners will be happy to leave it at that as it will present extremely well. What we need to do is crop the images.
When you decide the ratio to crop them take into consideration the layour of the majority of items and where the product focus area will be. If you sell clothing you will probably take more portrait photos than landscape. If you sell paintings or furniture you may have more landscape images. Work out which type of image layout suits the majority of your images and go with it.
1:1 cropping will make square cropped images. that’s very simple to work with. You can set custom cropping instead.
When you select custom cropping you will have ratios in which you can crop the images, as shown belo
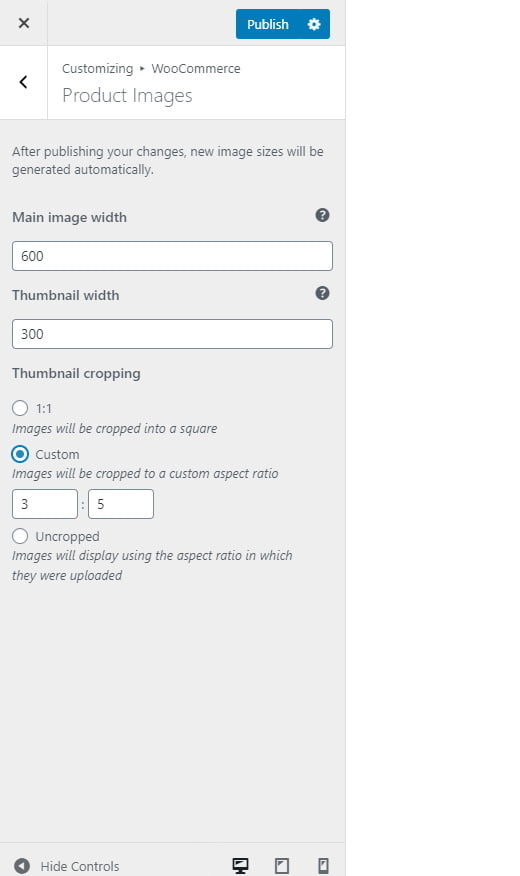
In the example above it is set to 3 and 5. that’s 3 on the horizontal and 5 on the vertical which will create a cropped portrait image. If you were to change it to 5 and 3 it would create a cropped landscape image. A ratio of 1 and 1 or 2 and 2 or 3 and 3 will create a square cropped image. Select the desired ratio that you think will work best and click publish at the top of the screen.
Now, if you were to visit the shop page nothing will have changed. We need to fix that at step two.
2. Now you have the image dimensions set we need to regenerate the thumbnails. WooCommerce has in built thumbnail regeneration, but I’ve never found it to be reliable. Instead, I use Regenerate Thumbnails. You can follow our how to install a WordPress plugin guide to install it
3. Click the big blue button that says Regenerate Thumbnails For XX Attachments
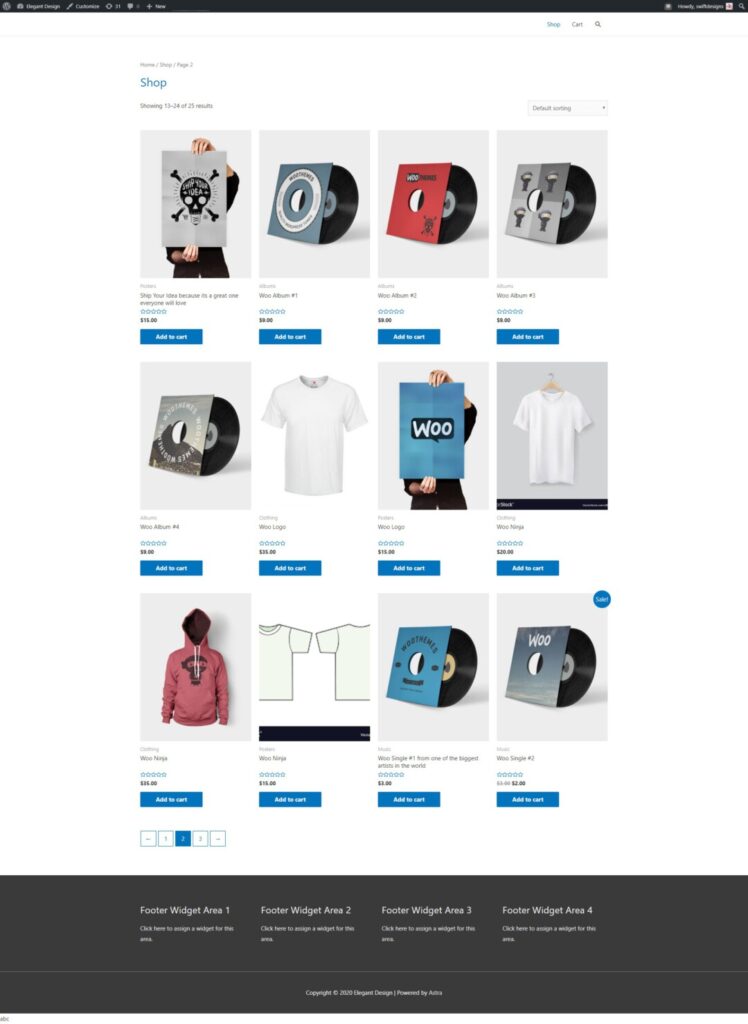
4. Have a coffee and maybe Netflix and chill while it runs through the process of regenerating all images. If you have a large number of images it can take a while. Once it has finished visit the shop page and you should see things are very different. It’s almost perfect.
If you’re happy with how things look and want to leave it at that, not a problem at all. 95% of WooCommerce websites will be satisfied with how it currently looks. But as you can see, things aren’t quite perfect. You can finetune it a little further. This does take things up a notch, but it isn’t that difficult and is safe.
5. Let’s start jazzing it up and make it perfect. If this is the first time you’ve used CSS it might be scary, but it is empowering. It is something that you will fall in love with and possibly lead you down the coding path. For this it’s best to use a modern browser like Chrome or Firefox.
The first thing you’ll notice is that there might be an image that’s a lot smaller than the rest. This is often caused by uploading small images or images that are significantly differently proportioned so they don’t crop well. You can replace the image if you have one, which will be the better option. If you can’t replace the image it’s time to use CSS.
If you are uncomfortable doing the following or you feel it’s out of your league there’s a very handy plugin available that can help you set the following fields with a simple what you see is what you get visual composer. Follow this link to get your copy of Yellow Pencil and save time with your CSS
If your images are perfect but you want to make further adjustments skip through to step 10.
6. Begin by right-clicking on the small product image and selecting inspect on Chrome or inspect element on Firefox.
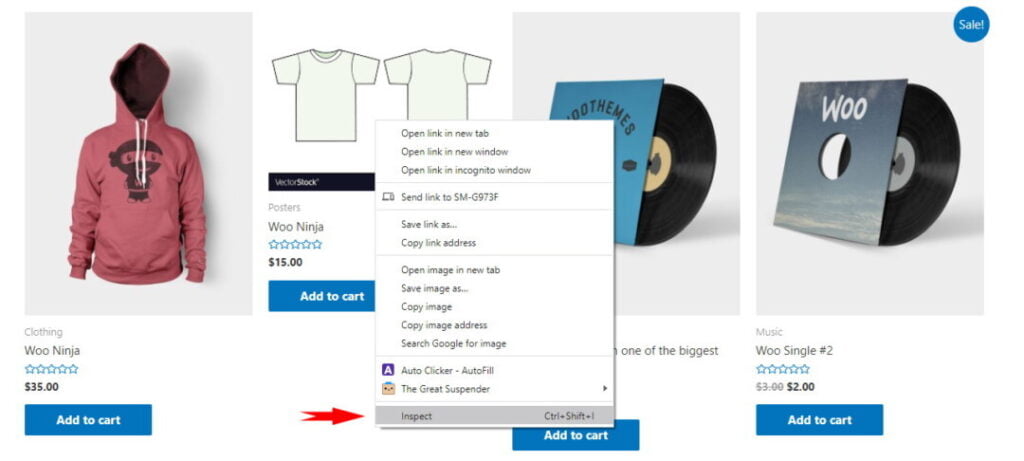
You will see a small window appear at the bottom of the page with a lot of code. Don’t panic. You can’t break anything, but you can have fun. This is 100% safe and if you think you broke something simply refresh the page and it will be back to normal. Any changes you make here are not live
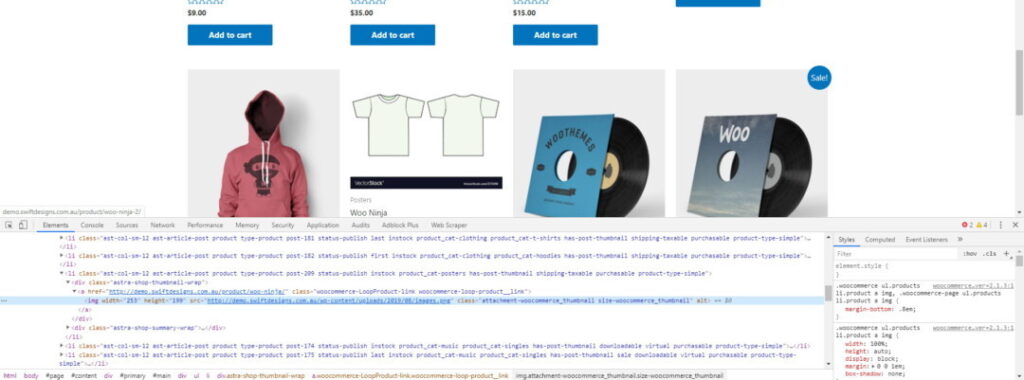
7. Find the image to adjust. All themes will have different selectors to use, but they will generally follow the same or similar structure. In this demo I’m using Astra.
Hover over the code and you will see either outline of coloured shading depending on the browser you are using. When you see the image highlighted by either a blue shade or outlines (depending on the browser) click the line of code. It will probably begin with <img
8. Adjust the height of the image. Once the line has been selected click the small + in the top right of the highlighted area and enter the height of the other images in the window to the right and adjust it until the image is perfectly in line with the other images. You can find the height of the other images by using the inspect element on the image. As you hover the code it will display the image size near the image.
If the image height doesn’t change simply add a space followed by !important. that’s an exclamation mark no space important. This tells the browser to use this code as a priority.
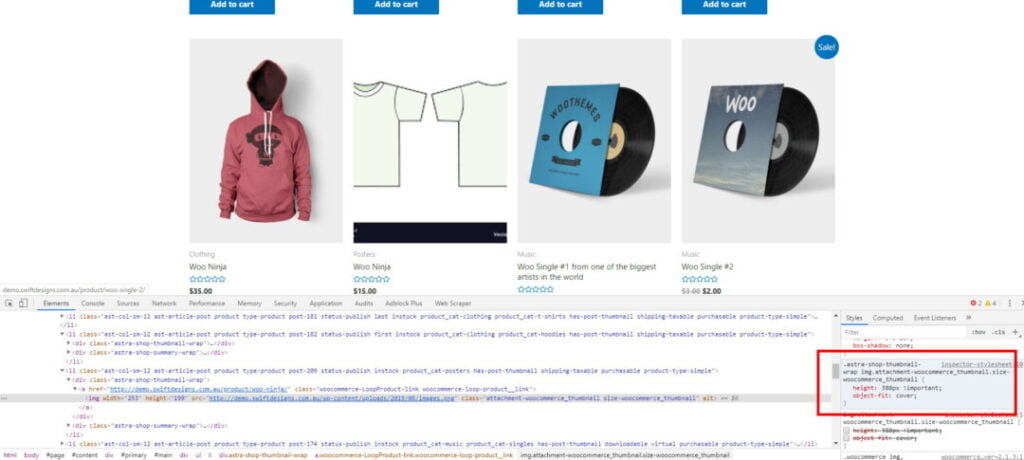
9. Adjust the cropping. Once you set the height is may look a bit off. We need to crop it. Under the height line enter this bit of code under height.
 height: 380px !important;
 object-fit: cover;
The image will now be cropped and the same size as the others.
Copy the entire body of code to a notepad for use in a moment. It should look similar to below
img.attachment-woocommerce_thumbnail.size-woocommerce_thumbnail {
    height: 380px !important;
    object-fit: cover;
}
Now we need to adjust the other elements
10. Right click on the title and select inspect or inspect element again
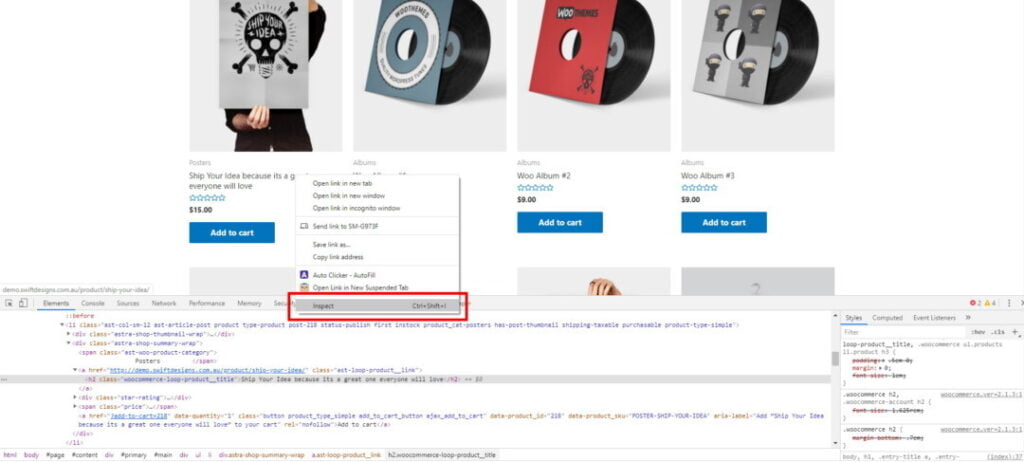
11. This time we need to adjust the height of the product title. Select the <h2 line of code that is the largest on the screen
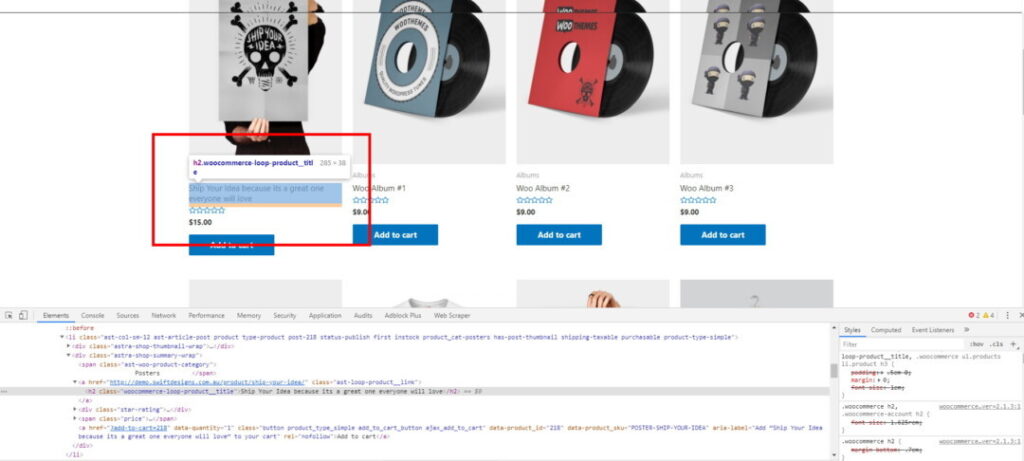
12. With your mouse hovering over the <h2 line look for the highlight and height of the h2 title. This will appear near the title. In the example below you will see the height of the title is 38px
13. Now that we have the height of the largest title we need to click the + icon at the code area in the right pane
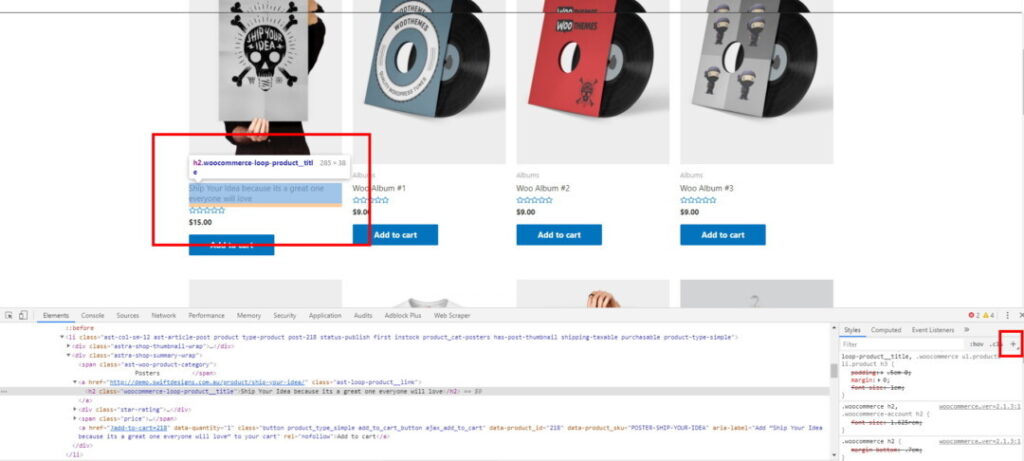
14. Next, we need to enter the height of the title in the new line we just added by clicking the + icon. Instead of entering a firm height we will enter a min-height value. The reason for a min-height value is just in case you later have a product that’s longer than the current number of lines. With a hard height set the final line will be cut off mid-way through and look weird. the top halves of the words will be visible but not the bottom halves. By using min-height anything over that height will display normally. For example. Say we adjust it for 2 lines like in the example. If we later add a product that has 4 lines for the title it will display all 4 lines instead of cutting it off short. The shop page may look unusual with 4 lines until you adjust it further but it won’t cause problems with shoppers in the meantime. in any event, it’s best to try and keep titles to a maximum SEO title length of 60 characters
Below is an example of the code. Copy it to the same notepad as before on a new line.
h2.woocommerce-loop-product__title {
    min-height: 38px;
}
It should push the content down keeping everything in line as the below image shows
As you can see everything is now perfectly aligned, but if you refresh the page it will be back to how it was before, We need to add the few lines of code to the site. Don’t be scared. This is easy and safe
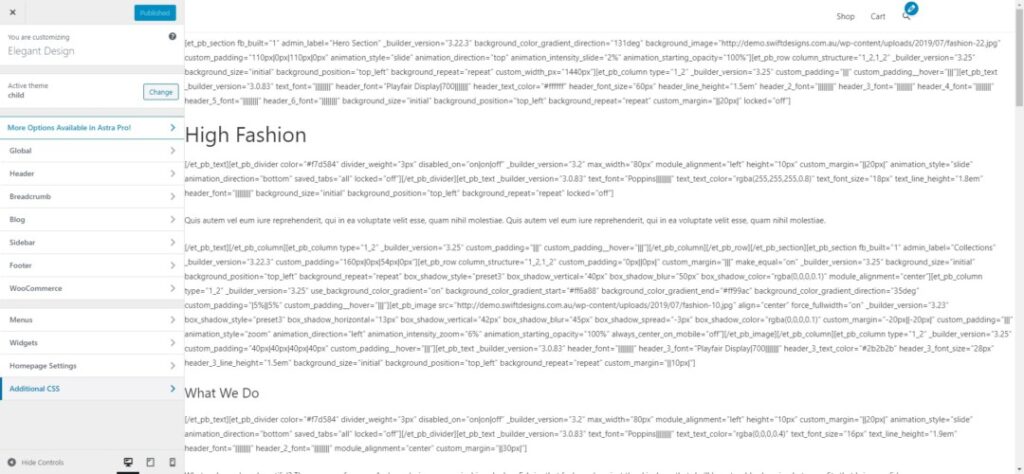
15. In your WordPress dashboard admin go to Appearance >> customizer and select custom CSS at the very bottom of the left sidebar
16. Add a comment so you remember what it is. A comment is a section of code that doesn’t display in a browser but allows others to see what the code actually does and why it’s there. This will help you find and remember what you were doing, A comment will look like below
/**
 * My custom CSS code to aling shop page
 */
Below that comment block enter your CSS from your notepad. The entire block should look something like this
/**
 * My custom CSS code to aling shop page
 */
img.attachment-woocommerce_thumbnail.size-woocommerce_thumbnail {
    height: 380px !important;
    object-fit: cover;
}

h2.woocommerce-loop-product__title {
    min-height: 38px;
}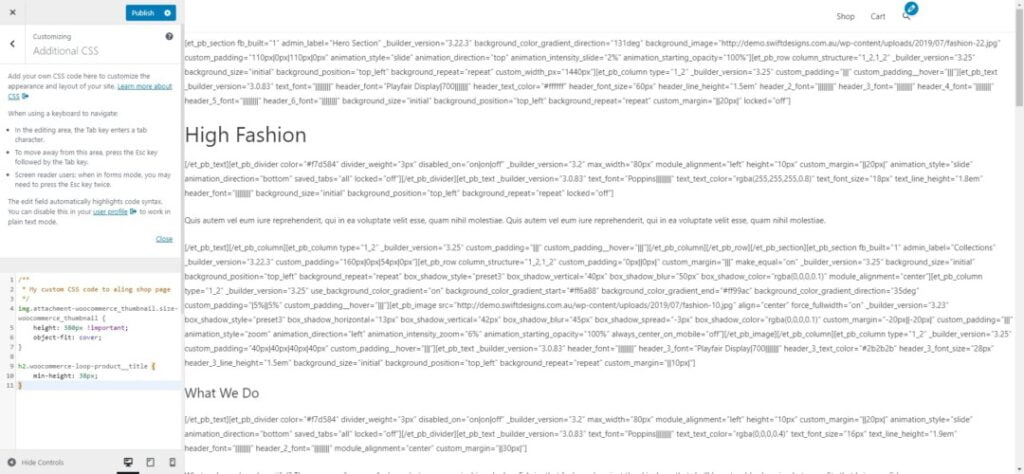
17. Click publish and visit your shop page and it should be applied. Just remember to clear your cache to get a fresh copy.
If you find that some other elements on the shop page are causing layout issues you can use the same method to adjust them too. Once they’ve all been adjusted the shop page will look spectacular.
You can later use CSS to add borders, box shadows, transition and hover effects and much more.
That’s how to easily align your WooCommerce shop page products for a perfect alignment
I have been working with WordPress and WooCommerce since 2012 and have developed a deep knowledge of the content management system. Since 2012, I have developed several plugins and designed dozens of websites utilising different frameworks, CMS’s and programming languages. I am proficient in PHP, Python, Java, C, C++, R and JavaScript with limited experience in Go, Kotlin and Swift.
Educationally, I have a Master’s degree in cyber security a Bachelor’s (Hons, First Class) in Applied Research and a Graduate Certificate in Data Science. I’m currently undertaking PhD studies investigating IoT cybersecurity. I recently graduated with First Class Honours and Masters of Information Technology, receiving the Executive Dean’s Award for studies undertaken in the 2021 and 2022 academic years. I have worked in the information technology industry for the past 11 years primarily as a software/web developer specific to design, optimisation, network management and security. My research interests are in the areas of Internet of Things (IoT), 5G and Beyond Networks, information security for wireless networks and software development.
Stay In Touch
